

I vividly recall my first morning in the whitetail woods; my dad a mere acorn's toss away beneath a towering oak where we watched a small buck and three does picking nuts only a week before.
It was an exciting time following a sleepless night in which I’d rehearsed exactly what I’d do when a hat racked buck strolled along the trail 30 or 40 yards down the ridge and I’d shoulder my slug-loaded Remington double-barrel and take aim.
But it didn’t happen. Save for several does that sprinted by in mid morning, and a small spike buck in the afternoon, action on that cloudy deer hunting inaugural was minimal. But the experience, in company of my dad and two uncles, remains a cherished memory. That was 1953 and thoughts of that first day in the woods with my mentors remain crystal clear.
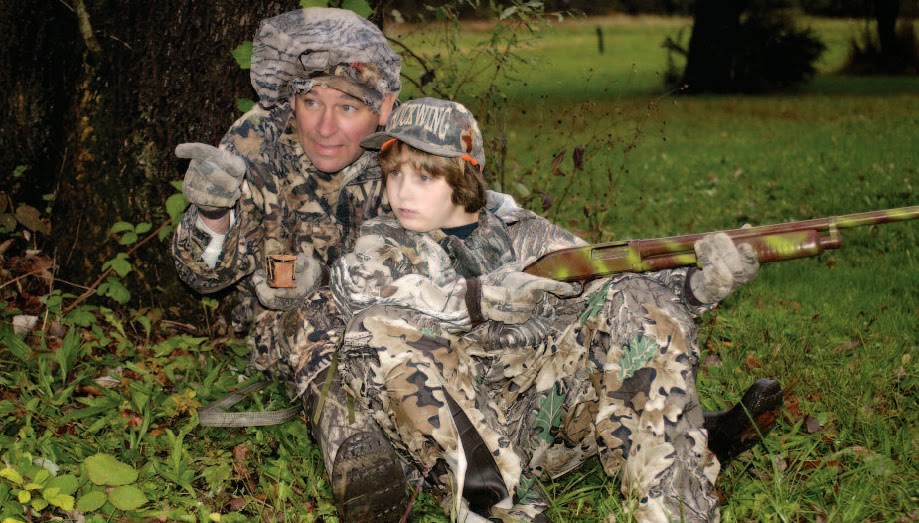
Unfortunately, only a minority of today’s young hunters are afforded the opportunities with which I was blessed as a “country kid.” Their pre-hunt exposure to hunting of any sort, whether for whitetails or cottontails, gray squirrels or gobblers, is typically minimal. For that reason and others, a goodly part of my hunting time today is spent in the company of kids – my own and others – and I’ve come to appreciate the importance of the task undertaken by mentors wishing to pass on this lifetime addiction to woodlands, whitetails, woodchucks, waterfowl and other game – but especially whitetails.

First Time Out
If there will be a young hunter at your side this year and/or next, consider these suggestions which set the stage for an equally unforgettable “first time out.”
Many states require the completion of a hunter education course by attending formal classes or via the Internet before a license can be purchased. Upon satisfactory completion of the course, mentors should follow up with a review of what was learned. Of priority is reinforcing gun handling safety with your rookie hunter. Stress the all-important rules of target identification no matter what sort of game you’re after.
Time spent on a shooting range is a must and lessons cannot be overdone. Commercial facilities, gun clubs, state-operated ranges or friends offering farmlands or other safe havens can be found across the country. Visits to a range to sight-in scopes and open sights using paper targets should be the kick-off lesson. When possible, search out a place where only the two of you will be present. Your student will play closer attention without being distracted, at least during the first training session or two. Make the experience a one-on-one venture to minimize distractions sure to occur when two or more kids are hosted.
Handling a rifle or shotgun can be intimidating to a kid with a natural fear of a resounding blast and the inherent “kick” when firing. Flinching is a common affliction that must be corrected. The shooter often doesn’t realize he or she is flinching and therefore aiming inaccurately. Sneak a spent shell into the chamber if you believe your student is jumping the gun and watch the reaction when the trigger is squeezed but only a “click” is heard. The lesson can be quite revealing.
Of course, ear and eye protection and constant and immediate reminders about unsafe gun handling practices and the seriousness of what your student is doing must be underscored throughout the instruction. Depending on a kid’s physical and mental maturity – no matter what the age -- use a gun he can easily handle for the first practice sessions on the range. I prefer starting small with an air gun shooting BBs or pellets at paper targets. When that’s satisfactorily completed, graduate to a scoped .22 rifle followed by the shotgun or rifle to be taken afield.
Another valuable lesson is to take your new partner to the hunting grounds where both of you will be spending opening day. Prior to deer season visit the specific tree, tree stand or blind where you’ll be posted opening morning. Remember that in many states it's mandated that a licensed adult be close to the young hunter at all times. In some states the mentor must be “within sight of” or “close enough that verbal guidance can be easily understood.”
Point out trails, escape routes, rubs and scrapes and specify distances to various landmarks. Indicate “out of range” shots and unsafe targets (deer on a horizon, for example). Use deer photographs from magazines to show where a bullet or arrow should penetrate for maximum effectiveness. An informal scouting trip or two will alleviate many first-time fears for the new hunter while bringing a dose of fun to the lesson.
For small game, waterfowl and turkey hunting, similar pre trip lessons are invaluable. As these “sports” require mentor and student to work side by side, a “mock hunt” serves as an excellent primer on what to expect under actual hunting conditions. Set up as if you had a gobbler responding. Walk a field and kick brush piles for cottontails. Sit in a waterfowl blind and specify who gets shots at “left to right” or “right to left” flying geese or incoming mallards. Use a 4-foot stick as a fake “gun” while aiming on a squirrel shinnying up a tree. The scenarios will reinforce hunter education course lessons and provide a smooth transition to actions in the field.
Finish the lesson with the scattergun you’ll use afield for turkeys. This is a good time to explain what happens to the pellets as they leave the muzzle and travel to the target, no matter if shooting at a turkey target or a live turkey. A shot or two at 15 yards (showing the outline of a tom’s head and neck) and another couple at 30 yards should get the lesson across. The expanding oval pattern formed by the shot will be plainly seen.

Deer Parts: Identifying Missing Pieces
Thinking back across my four-plus decades of pursuing whitetails from Maine to Mexico, a goodly number of bucks and does upon which I’ve centered the crosshairs probably wouldn’t have been seen except for some revealing “deer parts.” While most experienced deer hunters are attuned to looking for tails, ears, legs, shiny noses, the glint of an eye and antler segments or the horizontal line of a back or belly, newcomers often fail to make the connection when only a fraction of an entire animal is seen. Delay things too long and that dark “stump” you’re watching may rise from its bed and run off.
Novices in the deer woods (and we were all novices at one time) typically take wide angle views of the terrain, often failing to see the smaller parts that might betray the presence of deer. Walks in the deer woods or afternoons perched in tree stands during the off-season helped my sons and wife learn to pick out “bits and pieces” of deer from the tangles, timber, scrub, swamp, understory and tall-grass fields. Bright and shadowy habitats such as the sunny edges of fields contrasted with dark woodland backgrounds also require careful scrutiny.
Movement is another giveaway. A closer look at a V-shaped form in the brush, for instance, may reveal a light-colored twig, not an antler tip as may have first been thought. Then again, it may be the other way around. Although a scoped shotgun or rifle scope may aid identification, a binocular with 8x-10x magnification is better and safer for studying stumps (bedded deer), twigs and small limbs (antlers), squirrel tails (twitching ears), sunlit leaves shivering in the wind (flicks of a deer’s tail), a horizontal line in an otherwise vertical woods (a deer’s back) or other objects which hint at the presence of a deer.
Once you go afield in that frame of mind that anything out of synch might be a whitetail you know you've come a long way in picking out the “deer parts” that put venison on the table and antlers on the wall.
Yet another effective teaching tool calls for one or two life size deer targets as used by bowhunters. Hide a 3-D target in brush, high grasses, behind deadfalls, in thick understories and in other habitat where only a rump, head, legs, back, belly or some other body part is likely to be seen at, say, distances of 40 100 yards. Then have your student (who should not witness where the mentor is placing the targets, of course) walk slowly with you in the woods or high brush and grasses seeking the hidden targets. Supply the student with a binocular to verify that some mysterious form (the 3-D target) is real or an illusion. For the youngest tykes—say four to six years old—fashion a fake binocular made of two cardboard toilet paper tubes and duct tape. Gazing through the two openings at varied objects pointed out by the mentor focuses attention on them even though no optics are required. Most students will be considerably older, but there’s also a need to get even the youngest kids involved in the basic activities of hunting.
Each One, Teach One
Many clubs and game agencies across the country hold educational field days which are invaluable in providing hands-on learning about guns, game and the spirit of the hunt. It’s up to those of us who choose to be mentors to follow up on the field day theme with an “each one, teach one” drive to give something back. Except for visits to shooting ranges, the lesson plan does not require going afield with a gun on those pre-season training sessions. However, depending on state law, allowing the youngster to carry an unloaded rifle or shotgun prior to the season can be educational.
Of course, each mentor has his or her own devices for training first-timers. I know one Pennsylvania mentor who insists that an actual squirrel hunt – where many of the same techniques used in deer hunting occur – be part of his early array of lessons. Another may be as simple as exposing a kid to the outdoors by taking him on a stroll in a woodlot looking for signs of wildlife. It opens the door to an impressionable young hunter’s eyes and mind.
These are the kids representing the future of hunting. It’s never too early to hook them up with a mentor who wants to give something back – while at the same time making things fun, meaningful and exciting.
