
Whitetail Institute forage products are considered by experts to be the gold standard of the food plot industry. The reason is product quality and much has been written in these pages about the Institute’s exhaustive product development,
real-world testing and product preparation. You might not have realized, though, that the Institute’s commitment to product quality extends even to its planting-date recommendations and planting instructions, so don’t cut corners with either. In this article, we’ll explain why it’s so important that you not depart from the Whitetail Institute’s recommended planting process, including our recommended planting dates and published planting instructions.
FORAGE SELECTION
The key to getting optimum performance from your forage planting begins with our first “don’t skip” step: Make sure you select the right Whitetail Institute forage product for each site. Factors that should affect
your choice include physical characteristics of the site and whether you want the forage to perform year-round, for one fall and winter, or for one spring and summer. Each of these factors can vary from plot to plot, and you’ll need to consider them all to select the correct forage for each site.
Physical factors include rainfall, soil type and slope, equipment accessibility and sunlight. Let’s take soil type and slope as an example. Many Whitetail Institute forage products perform well in similar soil types and
slopes, but there is a limit. Consider Imperial Whitetail Clover and Imperial Whitetail Extreme, which are at the opposite ends of the moisture-requirement spectrum. Imperial Whitetail Clover is designed for good soils that hold moisture, while Extreme is for good or lighter soils as long as the site is well drained. Neither may perform as well as designed if it is planted in a plot with a soil type and slope that’s ideal for the other. Let’s take equipment access as another example.
All Whitetail Institute perennials and most Whitetail Institute annuals should be planted in a seedbed that has been prepared with, among other things, ground tillage. If your site isn’t equipment-accessible, then your
seedbed-preparation efforts will be limited, and that can negatively affect the performance of Whitetail Institute perennials and most of its annuals. However, that doesn’t mean that you are out of luck. Rather, you just need to make sure you select No-Plow, BowStand or Secret Spot, which are high-quality forage products specifically designed to flourish with minimal ground preparation. In fact, no matter what planting situation you’re facing, with very few exceptions, the Whitetail Institute has a forage product specifically designed to meet your needs. It’s easy to determine which product to plant in each of your sites. Each Whitetail Institute forage product states the soil type it’s designed for right on the bag.
An article to help you select the correct forage for each site is also available at www.whitetailinstitute.com under the “Products” link. And remember — if you still have questions, our highly knowledgeable in-house consultants are just a phone call away.
PLANTING DATES
Once you select the correct forage for each site, the next “don’t skip” step is to make sure you know when to plant it. Each Whitetail Institute forage product is designed to be planted within a specific window of dates during the spring, fall or both, and every Whitetail Institute forage product comes with its own planting date map right on the back of the bag. The same planting maps are also available on-line at www.whitetailinstitute.com. You can see an example on page 11 of this issue.
HOW SHOULD I USE THE PLANTING-DATE MAPS?
Let me assure you the Whitetail Institute went into considerable detail to set the planting dates for each product. If you were to compare the planting-date maps for several Whitetail Institute forage products, you’d notice that while the dates for planting certain products are the same for some areas, the maps for other products may have different sets of planting dates for different regions within the same state. Even so, weather patterns can vary a bit from one year to the next, and we know that our customers are more in tune with current weather patterns in their particular area than we can be. So, to use our planting maps to best advantage, plant not only within our published planting dates for the product you’ve selected, but plant once the ideal conditions arrive during those dates.
With Whitetail Institute perennials, you can fudge a bit and plant a little 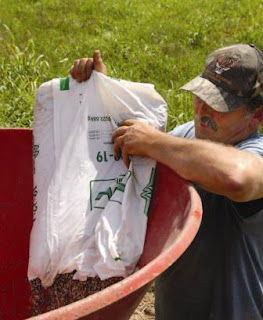

before or after the arrival of ideal conditions (as long as you are still within the planting dates). Whitetail Institute perennials, for example, are coated with Rainbond, a proprietary polymer seed coating that actually absorbs up to 200 times its weight in water from the soil, and keeps it right next to the seed as it germinates and starts to grow. If conditions are dryer than ideal when the seed is planted, the coating can also help the seeds survive longer without rain than raw seed. With other products, though, you must wait until ideal conditions arrive (within our published planting dates) before you plant. An example is PowerPlant. Because PowerPlant contains summer forage legumes (soybeans, Lablab and forage peas), it should not be planted until soil temperatures reach a constant (day and night) temperature of at least 65 degrees. If you plant PowerPlant, or any summer bean or peas before that, there’s a good chance the planting will suffer. Beans and peas are among the most fragile of all seeds; if you plant them in cool, moist soil, they can rot in as little as one day, so be sure you don’t plant before soil temperatures have reached 65 degrees, regardless of whether you’d still be within our published planting dates if you planted earlier.
PLANTING OUTSIDE OUR RECOMMENDED PLANTING DATES:
POTENTIAL PROBLEMS
If you plant outside our recommended planting dates, does that mean your forage planting will automatically fail? No, but the risk will certainly be elevated. One reason is that the forage roots may not mature in time to
handle extreme weather and that’s just with normal weather patterns —how often in your area has hot/dry or cold weather arrived earlier than usual? When most seeds germinate, part of the seedling’s root system
must develop before the growing plant appears above ground. Whitetail Institute perennials develop comparatively substantial root systems under-ground before they start to grow above ground in earnest, and planting too late in the spring can leave the forage too immature to handle the heat and drought of summer. Likewise, if you plant after our fall planting dates, you run an increased risk that the forage might not be able to handle a hard freeze that arrives early, or that the plants won’t be at their optimum when cold weather arrives.
Sometimes, customers call to ask if it is okay to plant outside our published dates because the weather in the area “has been” mild. We point out that what’s important is not what the weather has been, but what it will be. It’s what’s coming that matters, and forecasting the weather is obviously an inexact science.
So, rather than planting outside our dates, it is a better idea to wait to plant until your next planting window, and then use the interim time to do a good job of preparing the seedbed, i.e. liming, weed control, etc.
PLANTING FALL ANNUALS IN SPRING
Like all Whitetail Institute forage products, each fall annual is scientifically formulated with multiple forage components in specific ratios to complement each other, providing top performance from the planting during
the seasons for which it is designed. If you plant them in the spring, the cool-season components may be damaged or killed by the hotter, dryer weather of late spring and summer.
As is the case with the planting date maps, planting instructions for each Whitetail Institute forage product is printed right on the back of the product bag and are also available on-line at www.whitetailinstitute.com.
WHY WHITETAIL INSTITUTE PLANTING INSTRUCTIONS ARE SO SHORT
Don’t skip or cut corners with any step in the Whitetail Institute’s published planting and maintenance instructions. To see why, consider ourperspective in drafting planting instructions for our products.
Everything we do at the Whitetail Institute is done with our field testers in mind, and we know that long, complex planting instructions are the last thing our customers want to deal with. We also believe that overly detailed instructions would actually be a disservice to our field testers. One reason is that customers who’ve been with us awhile already have a feel for the finer details. Another is that the questions that arise from folks new to food plotting are so broad that an all-inclusive set of instructions would take up the whole back of the product bag.
To provide planting information in a way that will be the most useful to all our customers, we keep the published planting instructions for each product as short as possible. Then, we provide informational backups to the written instructions in several forms. These include immediate access to highly knowledgeable in-house consultants through our toll-free number, (800) 688-3030, during business hours, responsive emails that are informative and timely, and our DVD, Producing Trophy Whitetails, which we include with seed orders by customers who haven’t already received a copy. And unlike other companies who charge for “customer support,” the Whitetail Institute offers these services free to its customers. By structuring our planting instructions in this way, every field tester (whether experienced or new to food plots) has the basic information he needs in the published instructions, plus several avenues to get quick, knowledgeable information if he still has questions.
The best way to approach planting instructions is to realize that every step in the instructions is important, or it wouldn’t be there.
SOIL TESTING, SOIL PH AND LIME
The planting instructions for all Whitetail Institute forage products (including the full-preparation instructions for No-Plow, BowStand and Secret Spot) advise you to get a laboratory soil test if at all possible. As an alternative, the instructions say to add one or two tons of lime per acre if no soil test is available.
First, making sure that soil pH is neutral (between 6.5 and 7.0) is the single most important thing you can control to ensure that your planting will be successful. Most fallow soils have low, or “acidic” soil pH (below 6.5), and when those soils are planted without raising soil pH first, fertilizer is wasted because nutrients are bound up in the soil and inaccessible to the forage plants. As a ballpark, if you plant in a soil pH of 5.0, you’ll be wasting more than 50 percent of the fertilizer you put out. In monetary terms, that means that for every $100 spent on fertilizer, at least $50 will be wasted.
The best way to make sure your soil pH is in the neutral range (and if not, then how much lime you need to add to the seedbed to raise it) is a laboratory soil test. High-quality laboratory soil tests are available for about $10 from the Whitetail Institute, agricultural universities and County Agents. Again, be sure you use a soil test kit that actually sends soil off to a qualified laboratory for testing — that’s the only way to be sure you’ll be adding exactly the amount of lime (and fertilizer) you need without wasting money on lime and/or fertilizer you really don’t need.
SEEDBED FIRMNESS AND SMOOTHNESS (BEFORE SEEDING)
Our next “don’t skip” step might be better described as a make-sure you- understand step: Before you put out small seeds, make sure the seedbed has been smoothed to eliminate any cracks the seeds might fall into. That can be done with a cultipacker (roller) or a home-made drag made with a piece of chain-link fence with concrete blocks on top for added weight.
Seedbed firmness and smoothness prior to seeding are very important for any forage requiring a prepared seedbed. Seeds are referred to as either “large seeds” or “small seeds,” and as you’d guess, that describes the seed’s physical size. For example, large seeds include oats and beans, which are much bigger than tiny clover, chicory and brassica seeds.
The difference in size makes how you prepare the seedbed prior to seeding extremely important. Unlike a seedbed for larger seeds, which can generally be planted after disking or tilling provided the soil is not too clumpy, a seedbed must be thoroughly smoothed before planting small seeds. Small seeds must be planted on or very near the surface of the seedbed. If they fall into a crack or are otherwise buried more than about
1/4-inch or so, they won’t have enough energy for the seedling to push up to the surface, and they’ll die. Larger seeds should be covered by a relatively thin layer of loose soil.
SEEDING RATES
Try not to put out more seed than the Whitetail Institute recommends for the product you’ve selected. Whitetail Institute seeding rates have been calculated based on exhaustive research data at the Whitetail
Institute’s Certified Research Stations as well as by Field Testers across North America to ensure that they are optimum for that specific product. Every Whitetail Institute forage product comes with the recommended seeding rate right on the package. Going substantially over our recommendations on seeding rates can actually cost you. You’ll be spending money to buy extra seed you really didn’t need — and in some cases it can even compromise the quality of your stand.
As for stand quality, think about one square yard of your seedbed. Within that square yard, you have only so much room for forage plants to grow and fully mature their roots. If you crowd that space with too many
forage plants, that can cause the plants to battle for root space. Very crowded situations, can cause the roots to be stunted and can result in lower drought resistance and smaller plants above ground.
How to seed. A question our in-house consultants are often asked is, “The seed rate is so low — how do I put such a small amount of seed out on my whole plot?” To make sure you buy only the seed you need and to plant it 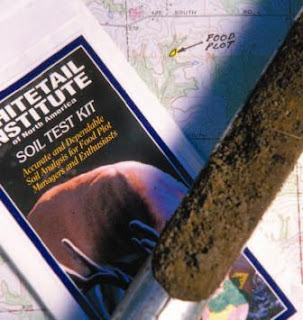

to ensure broad, even coverage, we recommend using a shoulder spreader.
First, set the gap in the spreader to the correct size opening. The high quality Earthway shoulder spreaders available from the Whitetail Institute actually have a chart on them that shows what setting to use for different sizes of seed. For other shoulder spreaders, set the gap by eye — specifically try to set it so that it looks like there’s no way enough seed will come out. In short, if the gap looks a hair too narrow, then you’re likely right on the money.
When your gap is set, put one-half the seed allotted for the plot into the bag. For example, let’s assume that you’ll be planting one acre of Imperial Whitetail Clover, for which the recommended seeding rate is 8 lbs. per acre. To start with, put only 4 lbs. of seed into the bag. Then, put that seed out walking north/south, and leaving 12 feet between each pass. Then, repeat, putting the other half of the seed out while walking east/west. That way you’ll have broad, even coverage with no gaps, and your forage plants will have room to grow.
SHOULD YOU COVER THE SEED?
Whether or not the seed should be covered and, if so, how, are additional “don’t skip” steps. Or, more accurately, they are “don’t fail to understand” steps. Here’s what you need to know in a nutshell:
Large-Seed Products. PowerPlant, Pure Attraction and Whitetail Forage Oats Plus include large seeds. These should be covered by a thin layer of loose soil.
Small-Seed Products: All other Whitetail Institute forage products are small-seed products.
A. If you used a cultipacker (roller) to smooth and firm the seedbed before broadcasting your seed, then cultipack once more after seeding to press the seed down against the firmed surface of the seedbed.
B. If you used a weighted drag-type implement to smooth the seedbed before broadcasting your seed, then do nothing further after you put the seed out. It will naturally settle right where it needs to be. Notice that in neither case are you “covering” small seeds.
PERENNIAL-FORAGE MAINTENANCE
Finally, don’t forget to follow the Whitetail Institute’s published maintenance instructions for Imperial perennial forage stands. The most important of these concern grass control and mowing.
Grass Control. Since most grasses tend to survive and reproduce through their root systems, controlling them in food plots is usually best accomplished with a selective herbicide. The Whitetail Institute offers Arrest, a selective grass herbicide that can be sprayed to control grass in any Imperial perennial stand, and in any straight clover or alfalfa stand. The Institute also offers Slay, which is more a broadleaf-weed herbicide but which will control a few of the heavier sedge-type grasses. Slay can be sprayed on established (sufficiently mature that at least two of the trifoliate leaves have unfolded) Imperial Whitetail Clover, and on any other straight clover or alfalfa. Before deciding to use Arrest, Slay or any other herbicide it is imperative that you check the label to be sure that (A) the herbicide will control the grass or other weeds you’re facing and (B) do so without harming your forage plants.
Mowing. If possible, try to mow established Imperial perennials a few times in the spring, and if you can, also in late summer or early fall (but, of course, not when the plants are stressed such as by excessive heat or drought). There are two reasons:
First, mowing can help perennial forage plants remain even more lush, nutritious and attractive; much like pruning a bush, mowing forage plants can help them produce thicker foliage, and produce it at lower levels on the plant.
Second, mowing before the forage plants have a chance to flower allows them to retain the substantial energy and nutrients that are expended when a plant flowers. Mowing can also help break the reseeding cycle of upright, annual weeds. Again, to get that benefit you need to mow before weeds flower.
This is true of all Imperial perennial stands, except Extreme, which should be allowed to flower, and for the flower and its seeds to dry at least once a year before mowing. Mowing Extreme after it flowers and the flowers dry helps re-seed the stand, and mowing helps scatter the seeds very effectively. To know when to
mow Extreme for reseeding, watch the flowers. They’ll turn lavender, and then brown. Once they’re brown and dry, mow the plot.
For more information about these, or any other matter relating to Whitetail Institute products, food plots in general, contact the Whitetail Institute’s in-house consultants at (800) 688-3030.